Showing posts with label printables. Show all posts

Monday, February 9, 2015

free printable // 'love you'


A couple weekends ago, my friend Grace, who is a lifestyle expert on the TV show Twin Cities Live, told me she was going to use one of my free printables in her TV segment for Valentine's Day. As soon as I was done picking my jaw up off the floor and completing my happy dance, I realized that the print was really quite buried inside its post and wasn't very easy to find. So I thought I'd resurrect it to make it easier to get, and what's more appropriate for a Valentine's post than a reminder that someone loves you?

This little phrase is something my pastor says to us on a near-weekly basis, so it's perpetually stuck in my head. He usually says it in a cheeky way after putting some sort of smack down on us, but I know he means it. And I mean it too. The link is at the end of the post. Enjoy!


Check out Grace's television segment on Twin Cities Live and see if you can spot my little print's cameo. You can also visit her blog to see all the cute Valentine's day gift ideas she has up her sleeve. She has a ton of inexpensive options that center around the heart of the holiday- spending time with the ones you love. Thanks for the honor Grace!


Friday, December 12, 2014

speakeasy new year's eve // invitations


hi again and happy friday (woohoo!) my sweet friends. we're approaching the ball drop in a series of new year's eve party ideas that my friends kyla from house of hipsters and grace from the big reveal and i have been bringing you this week. it's day five and we only have one left to go, so if you aren't convinced you need to throw this party by now, well...i'll still cross my fingers you change your mind.

for the rest of you, you need invites! we've got you covered. head over to kyla's blog for FREE printable invitations for your fabulous new year's fete.


aren't they so cool?! man, i wish i could do graphic design. she's like an awesome mysterious wizard. how does she do that?

to catch up on the rest of your party kit, all the links are below. we'll see you back here tomorrow for one more day in this series. grace will have a little DIY that's kind of like icing on a cake. i'll be sad to say goodbye but i also can't wait! see you tomorrow.


Wednesday, December 10, 2014

speakeasy new year's eve // photobooth


well i couldn't be more excited about today's post. first of all, i love photobooths, photo backdrops, and anything else photo-related. secondly, i gasped audibly (no, i wasn't alone, and yes, it was embarrassing) when grace sent me the gorgeous pictures she shot for today. they. are. so. good!!! kyla and i both used all capital letters in our excited responses, which if you read my blog you might notice, i don't break out much.

the bane of my existence (party-wise) has been throwing awesome soirees and not getting any good shots to preserve the occasion. just to give you a for-instance, last fall i threw a truly epic 30th birthday party for a friend...i hand crafted a whole wall of giant flowers, there was vintage lace, a garden setting, twinkle lights, hanging lanterns...the whole shebang. it was magical. and this terrible picture is the only picture i got. i have since learned the importance of taking the time to capture a moment.

do not let your new year's party suffer the same fate. set yourself up for photo success with a photobooth. today, grace has an easy tutorial for one that is so stinkin' adorable i could cry, and a free printable mugshot prop to boot!


is she not the cutest jailbird you ever did see?! head over to the big reveal blog for the how-to and your freebie!

and in case you need to catch up, this is part of a series of new year's eve party must-haves i'm bringing you this week along with my partners in blog-crime, kyla from house of hipsters and grace from the big reveal. every day we'll have a new essential ingredient for you to throw a fabulous bash. {your party kit thus far is below}

see you back again tomorrow!


Monday, September 29, 2014

a little bit of black & white // and free printables

good monday morning! today is my friend stephanie's (who i've mentioned before, before, and before) birthday. she's a great friend, a huge cheerleader for this blog, and the inspiration (and voice of reason) behind more posts than i can possibly acknowledge. as such, i'm turning the spotlight on her a little and giving you guys some free printables to celebrate. also, if i end up maimed by the side of the road somewhere you'll know it's because i showed you unedited pictures of her house without any permission to do this post whatsoever. (guess this is what birthday pranks look like when you're friends with a blogger. holla!)

steph has this gorgeous historic house, and has done so much to update it. i absolutely love her home and everything she's done, so when she asked me recently for some help "finishing" her family room, i about fell over. are you kidding- i should be asking her for advice! (hey, actually, that's a great idea...steph, i'll do your family room...you do mine...)

but i totally get it. i think family rooms are really hard. they're where you hang out all the time, and therefore you look at what's in them all the time. they can feel tired really fast. they also get a ton of use, ie. wear and tear. in our phase of life, there are little ones crawling everywhere and drooling on everything, so overly styled/ breakable objects are out of the question. the room needs to be comfortable and attractive, calm yet lively, organized yet accessible. and did i mention you have to look at it all day?

sometimes you just need a fresh set of eyes on a room to get your creative juices flowing again. so i'm here to throw out some ideas and help steph get back on her game and finish this room.


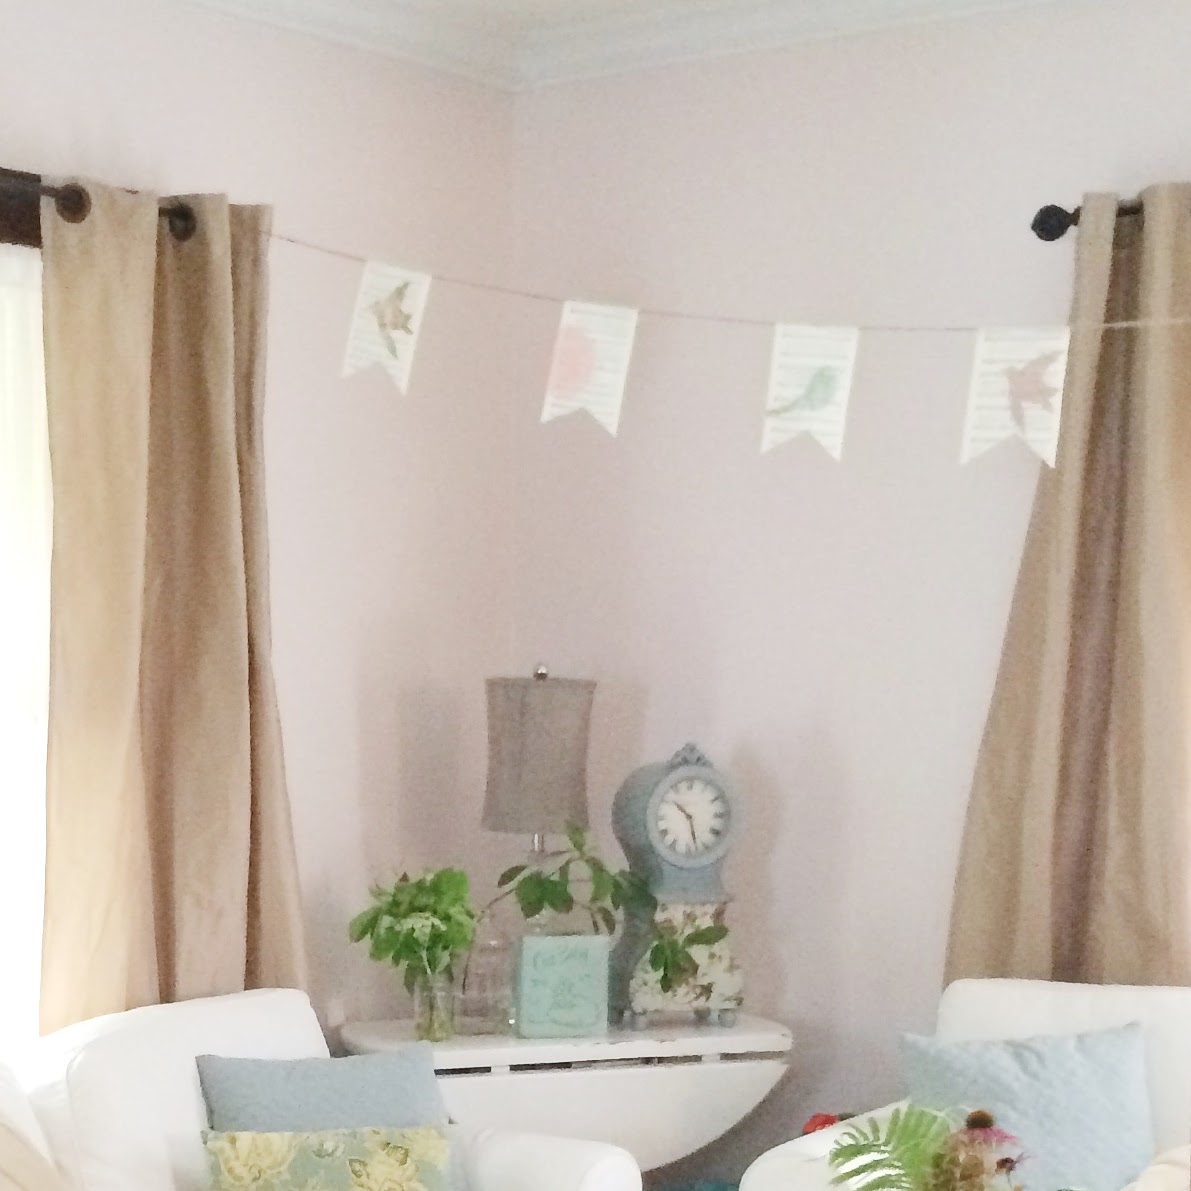
i'm sorry i don't have a good overall shot of the room- i was so busy shooting all the corners, i forgot to get one! the one above is from the recent baby shower we hosted there, so ignore the bunting and overabundance of flowers.


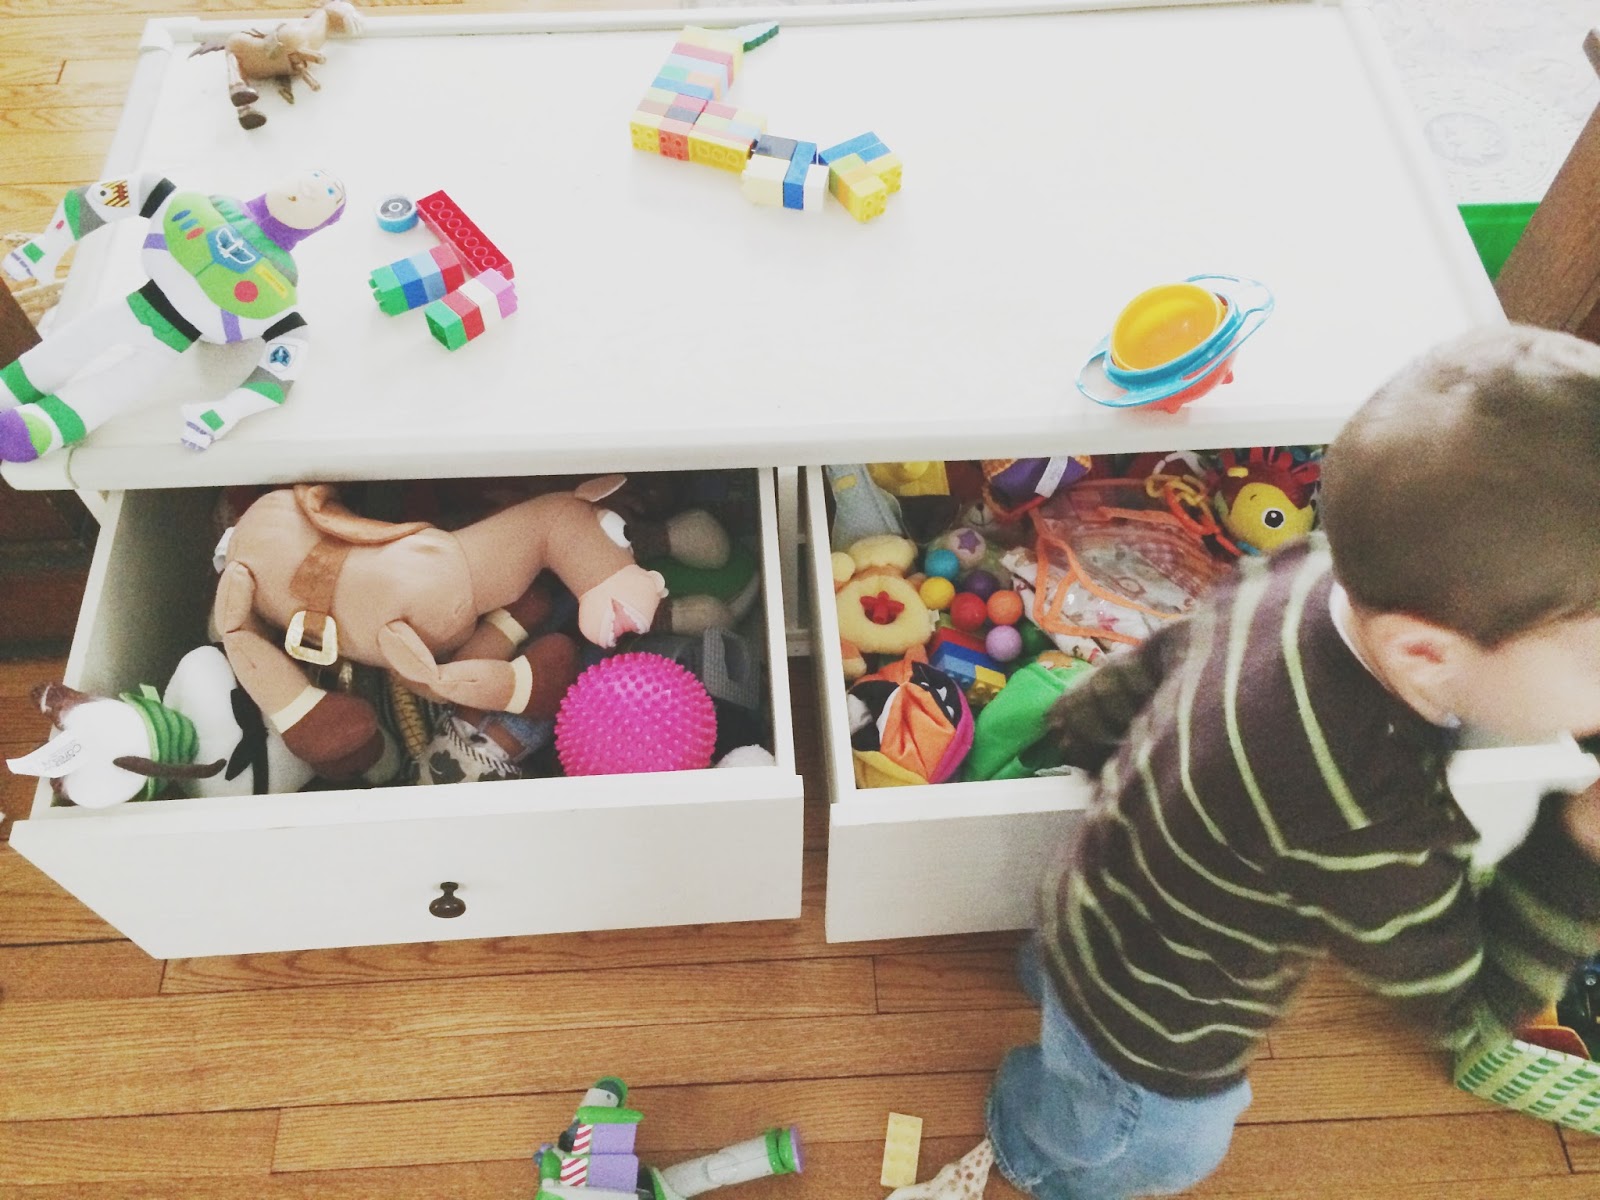
as you can see, things escalate quickly around these parts. steph's coffee table is a brilliant choice, with deep drawers to stash toys.


the above corner of the room has a target chair which steph scored brand new at the good will for $25. i am telling you...check there often. so many businesses donate new items!


as proof positive of steph's awesomeness, she just painted this room the pale perfect pink that you're seeing in these photos. yep, pink. (she's a mom of three boys, three and under no less, so she totally deserves a pink room, right?!) it is a great color and turned out beautifully.

it used to be a lovely shade of robin's egg blue so all her current accessories are in that vein. that needs to change pronto as the baby shower look is not what she's going for here. steph is thinking that adding a little black to the accessories will help glam up and modernize the space. i'm thinking that is a fantastic idea because it also keeps her historic house from feeling too serious, and is a classic color combo that she isn't as likely to tire of.


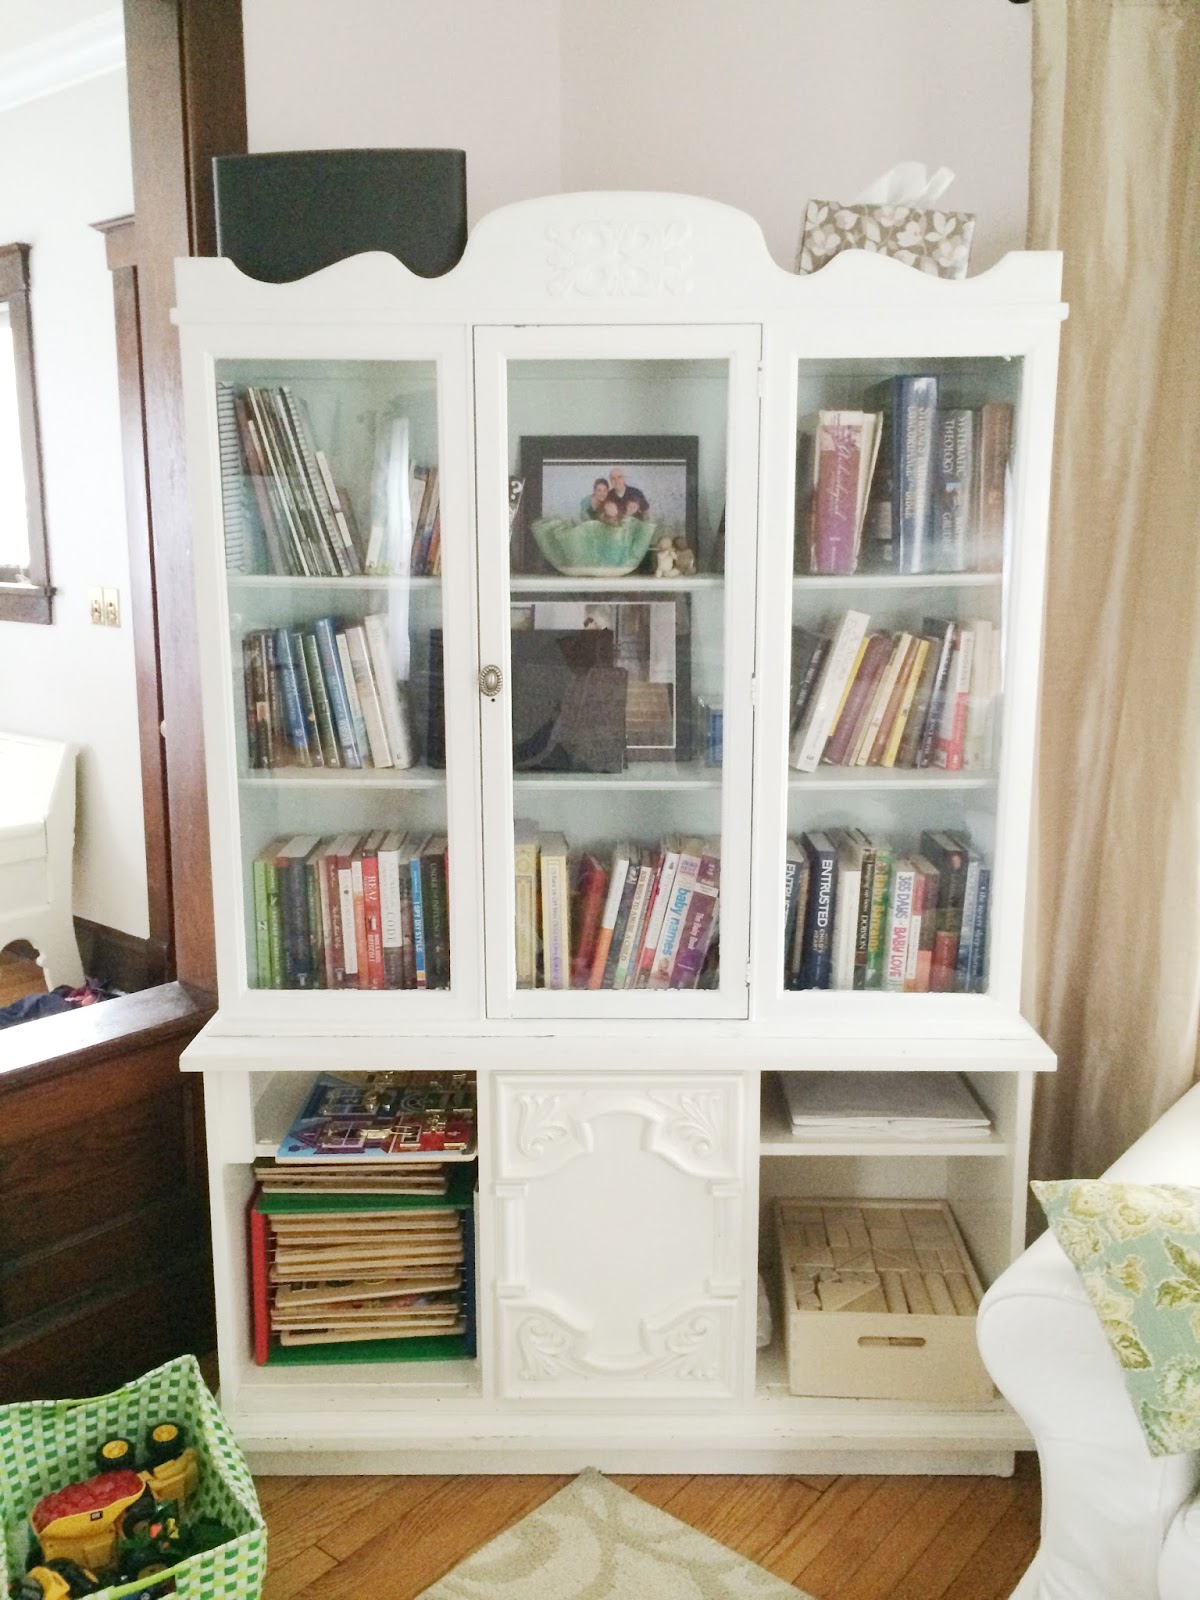
the other side of the room has a great bookcase that steph salvaged and painted:


hahaha, i am so laughing at those kleenex perched up top. it's the beginning of cold season in chicago (which just ended three months ago, by the way) and we have kleenex decorating every room in our house too. :)

i should also mention that no one wants to devote a ton of money to this update, as there are always more pressing needs, so steph's budget is going to be her little stash of birthday money. (p.s. i am always happy to help any of you spend your birthday money...just call me up).

so happy birthday stephanie; i got you a family room design this year. :)

as was my mantra for this recent console restyle, let's start with what we have. stephanie has this print from lindsay letters as well as a chalkboard she recently made:
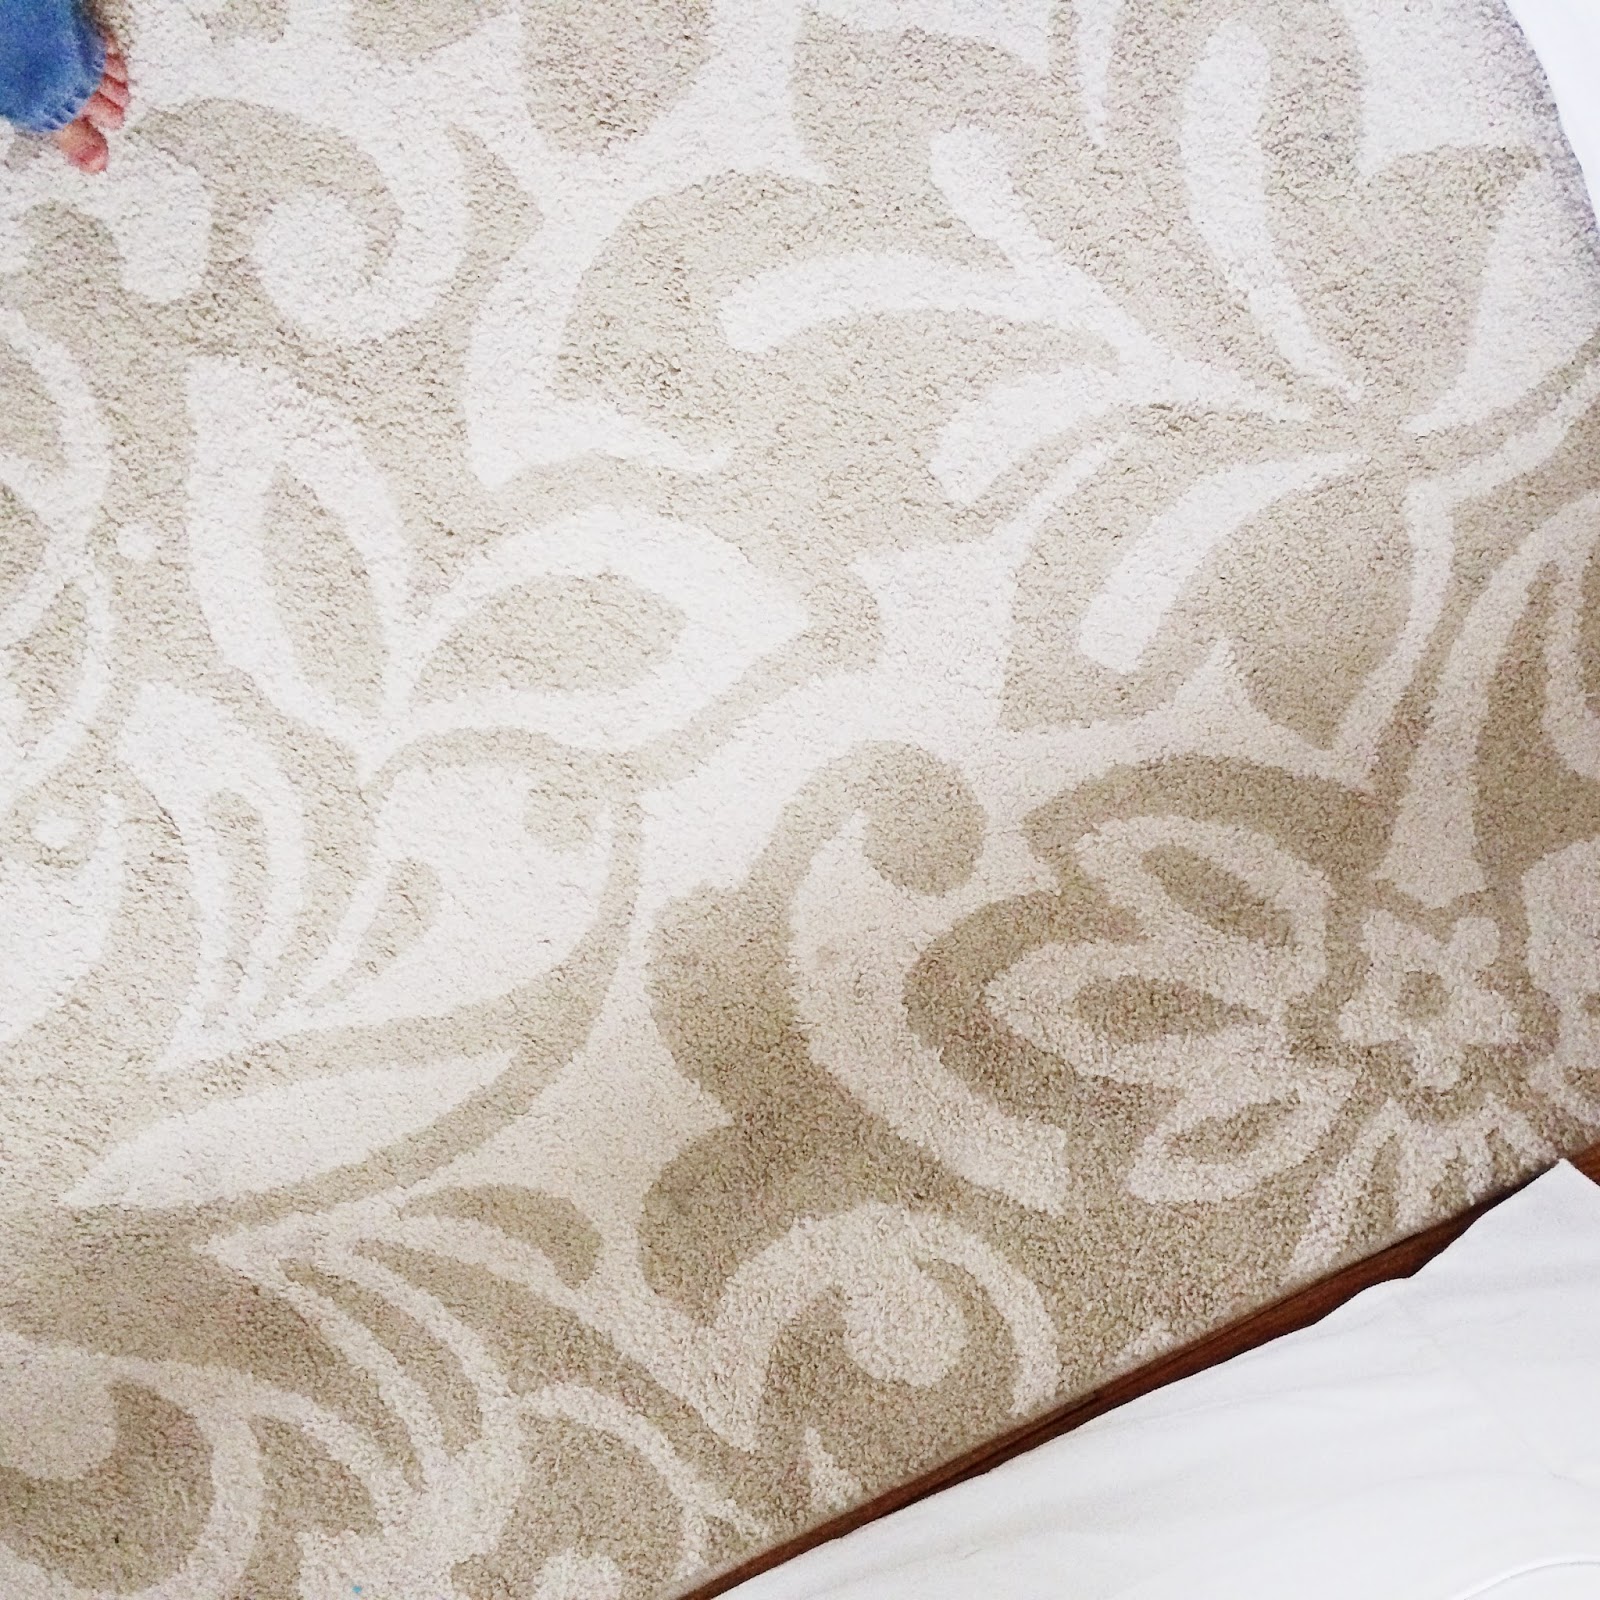
her existing rug will be perfect, as she'd like the overall color scheme of the room to end up being pale pink / gold / white / black & taupe:


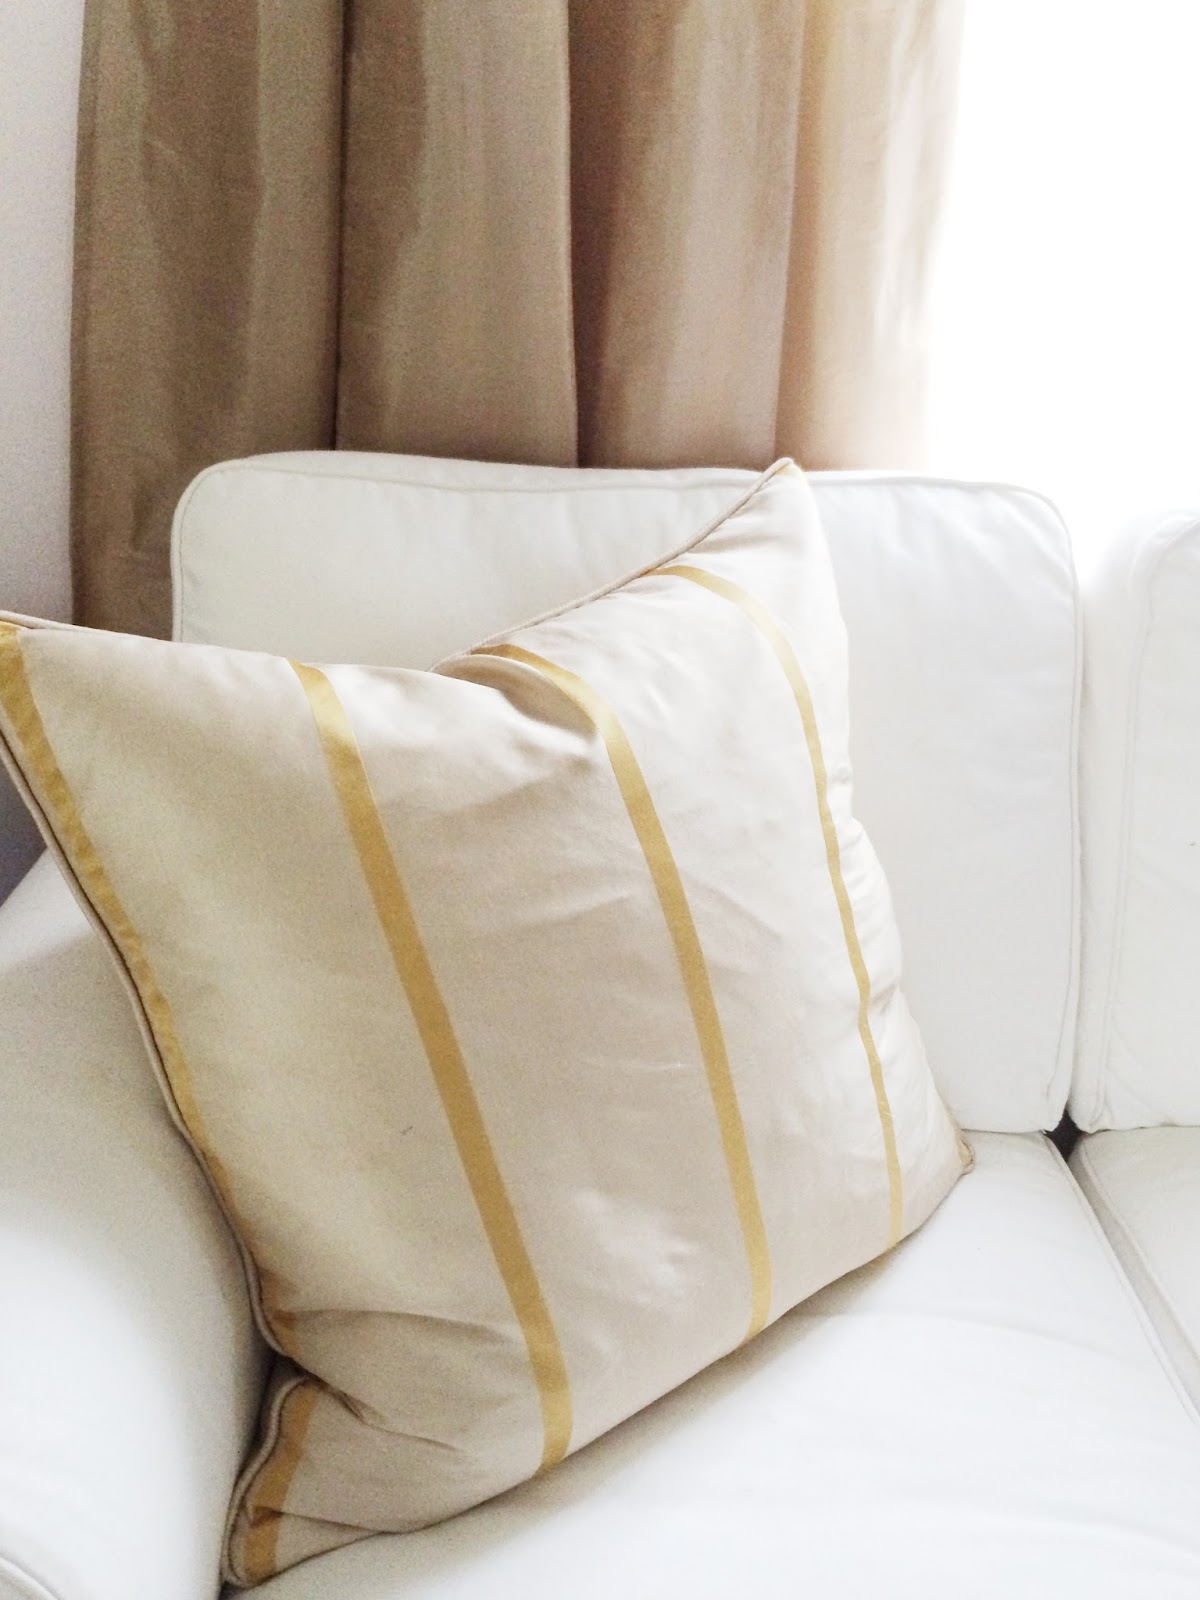
her drapes are a beautiful silk taupe so they will certainly stay. these pillows with gold striping could stay as well:


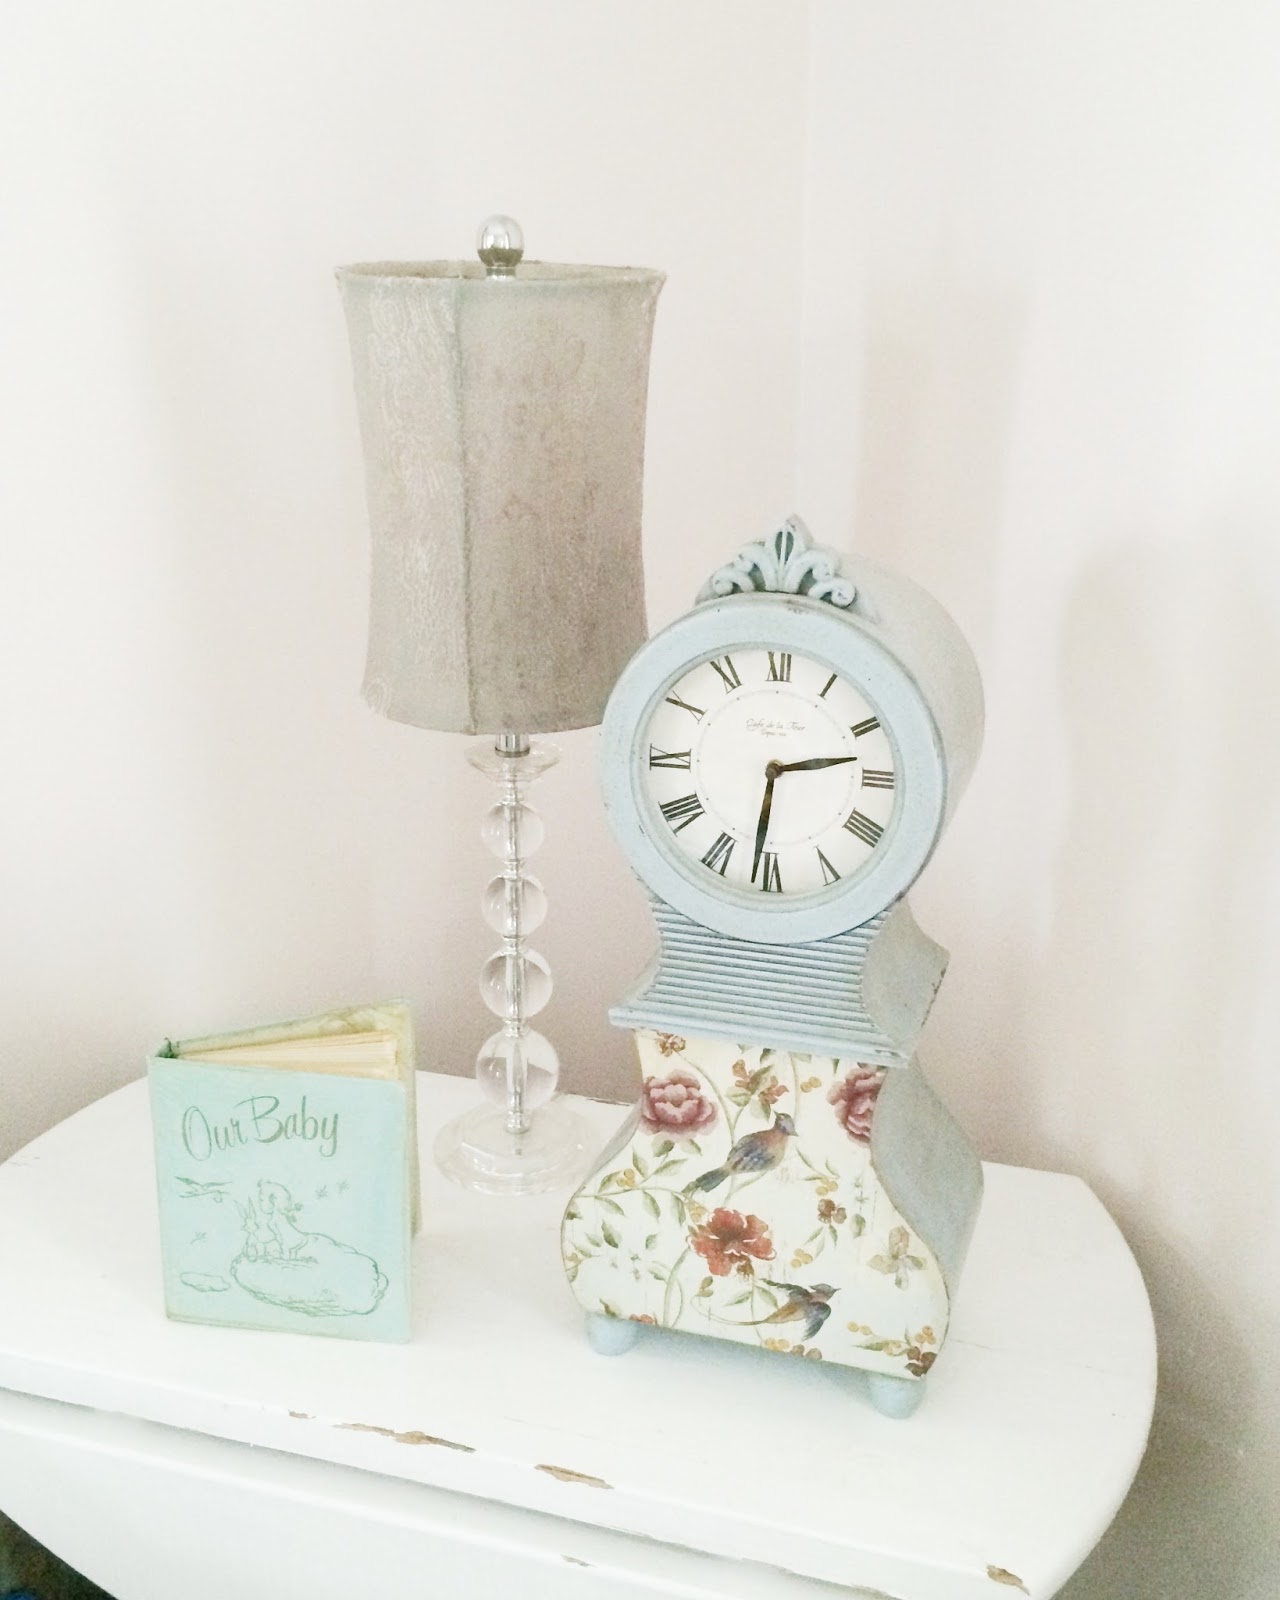
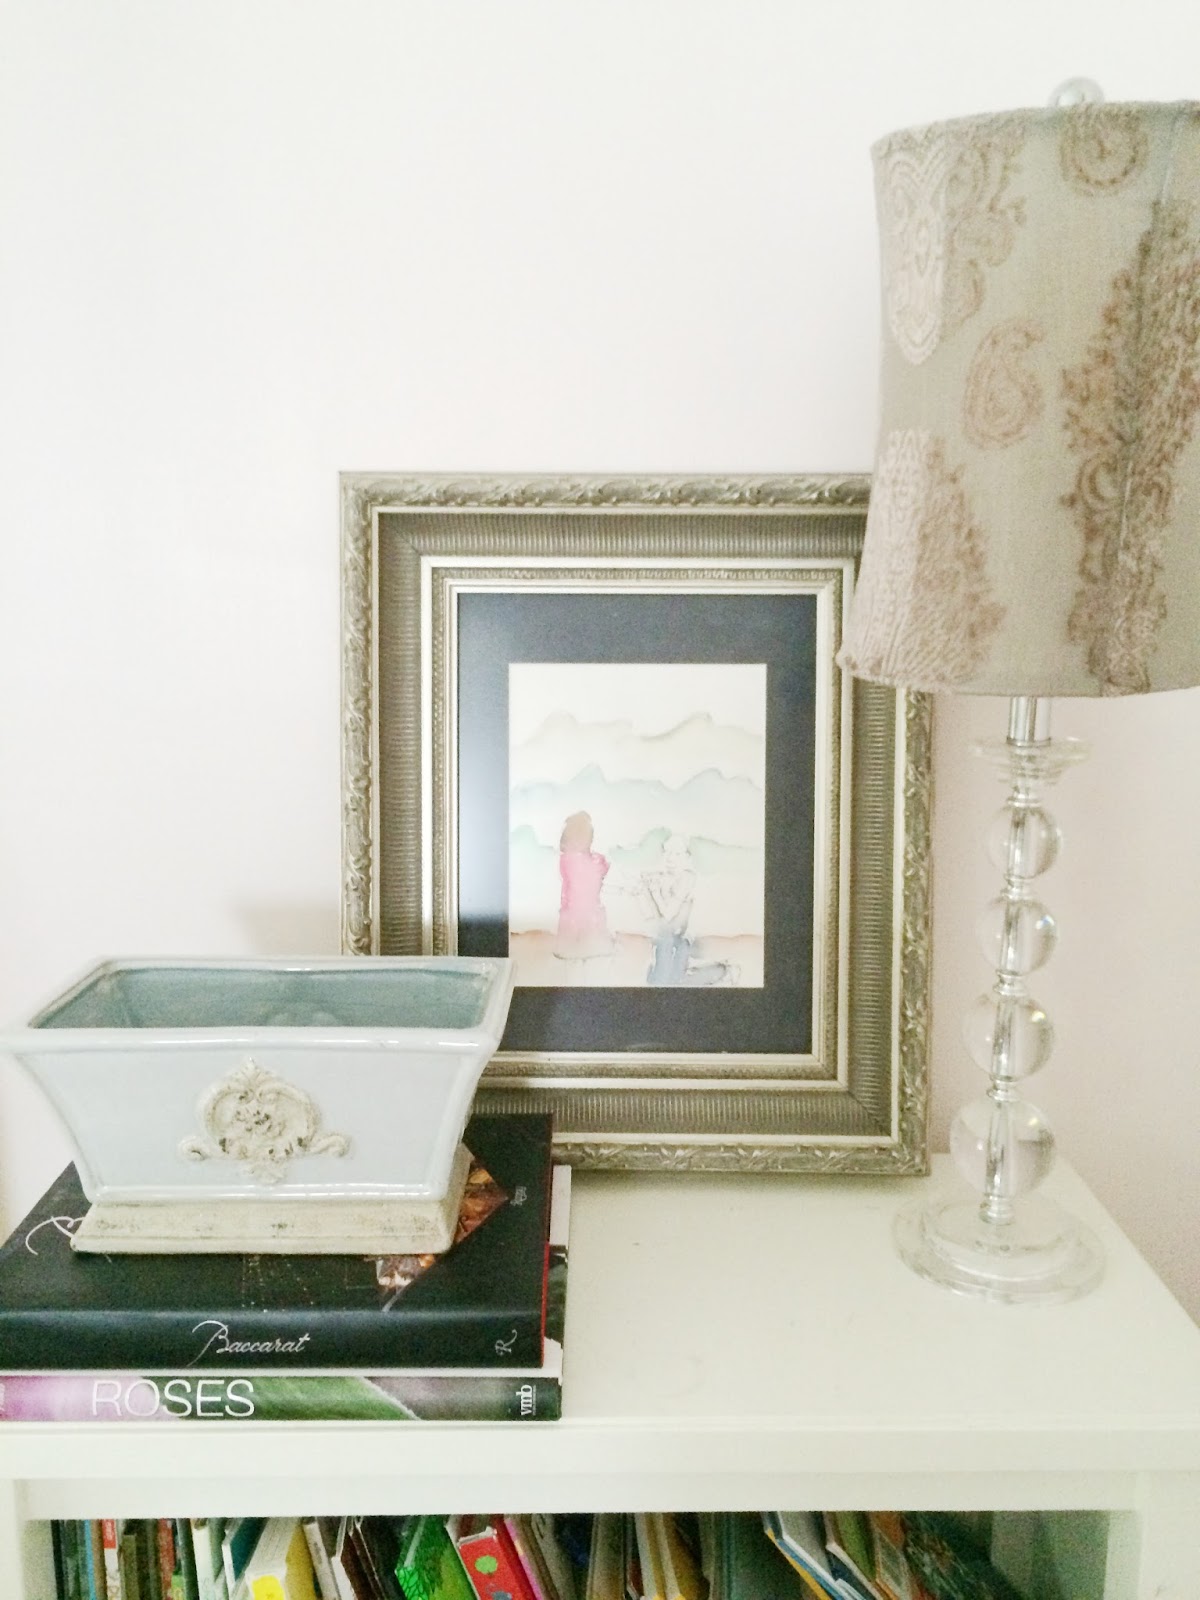
this print was commissioned by steph's husband and is an artist's rendering of their engagement. (um, hello, hubby bonus points). it has sentimental value and pulls in pink and gold, so it gets to stay too:


the lamp you see above is perfect for the "glam" factor with its crystal base, but the silver sage shade needs an update. since steph told me the shades aren't sacred, i'm suggesting she keep the whole lamp but go at the shades with some black fabric spray paint. she'd have two whole new lamps for around $3.


my next suggestion would be to add two graphic black & white striped pillows. i could not believe it when i found the perfect covers at ikea for $5 each!

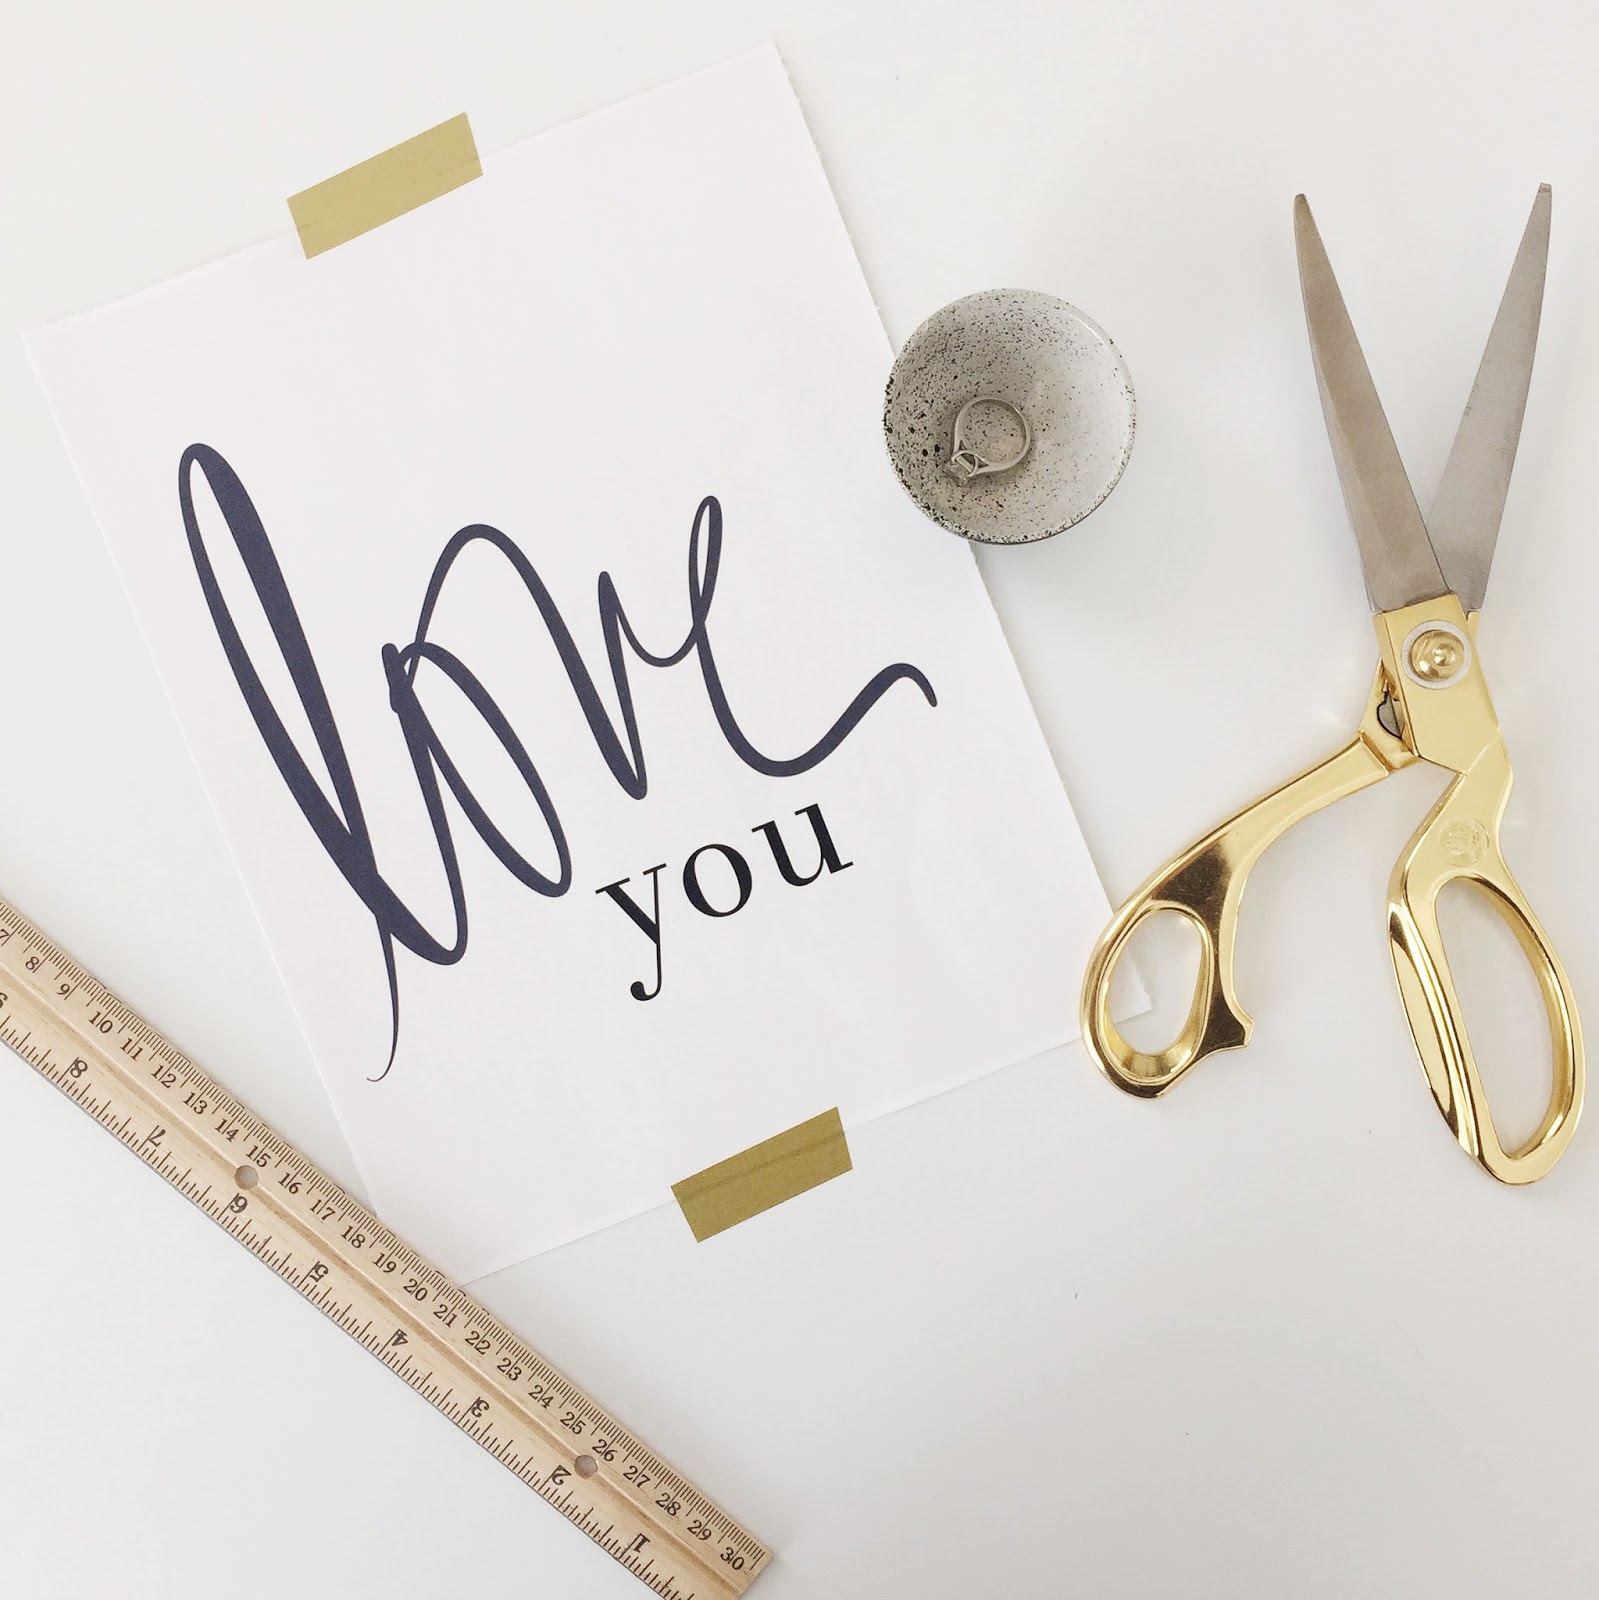
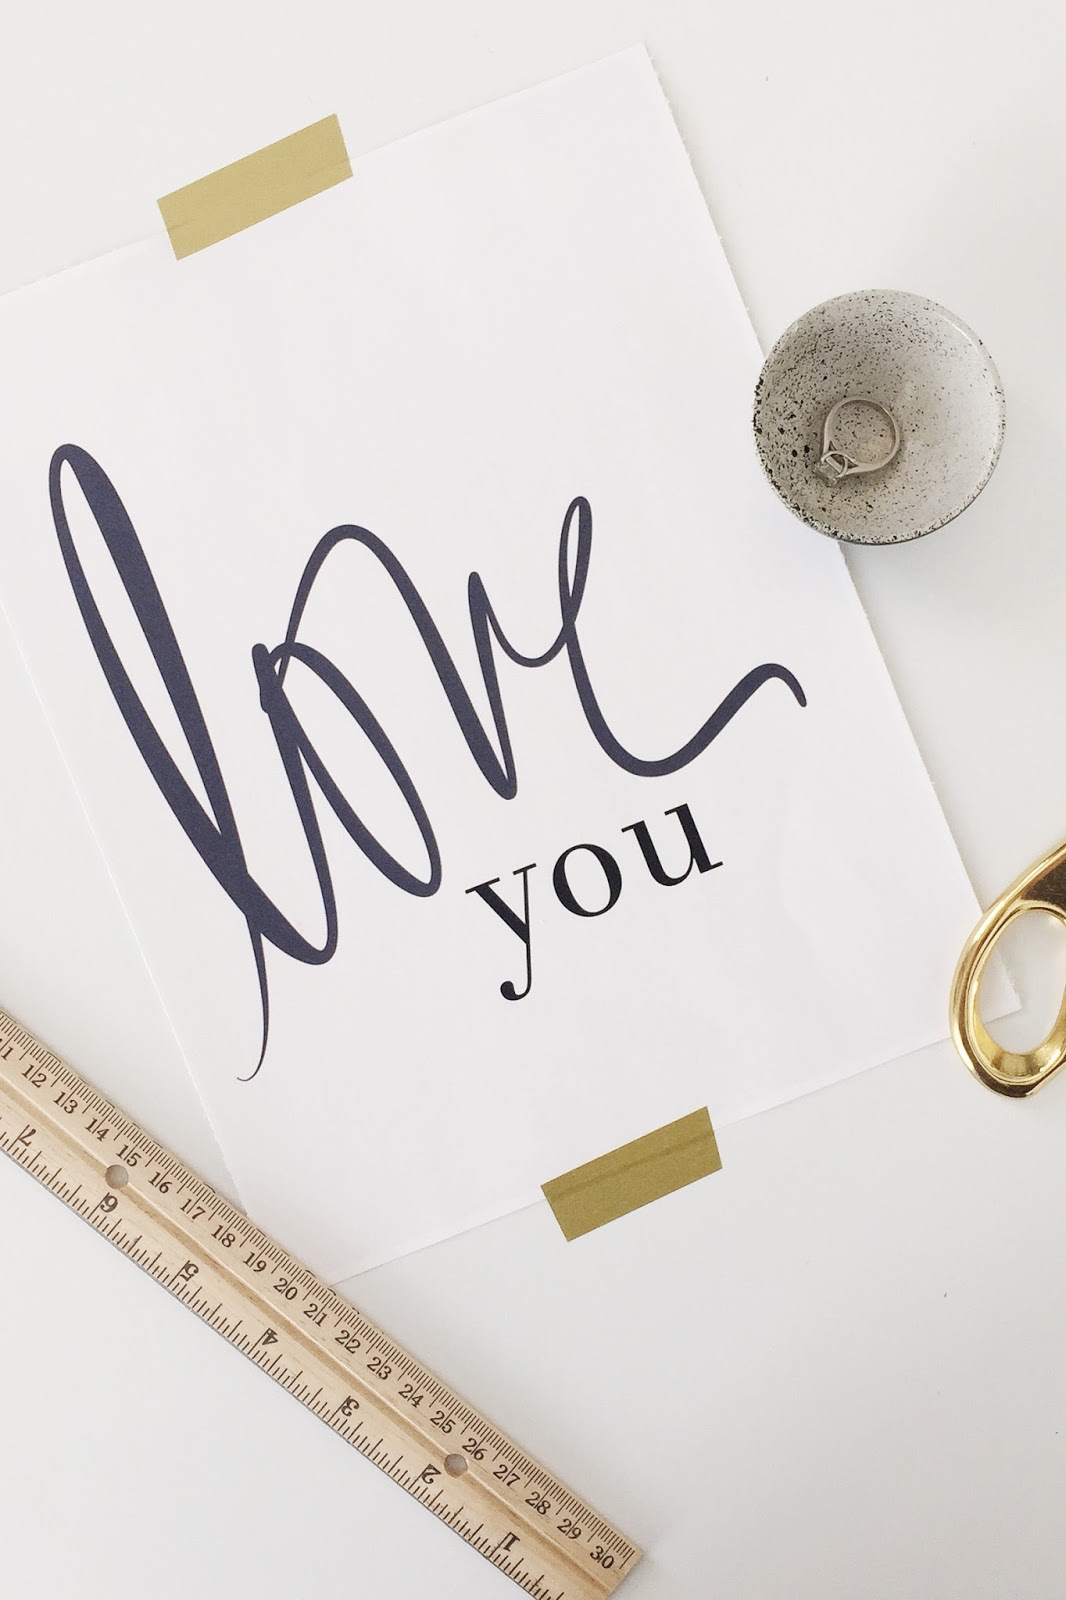
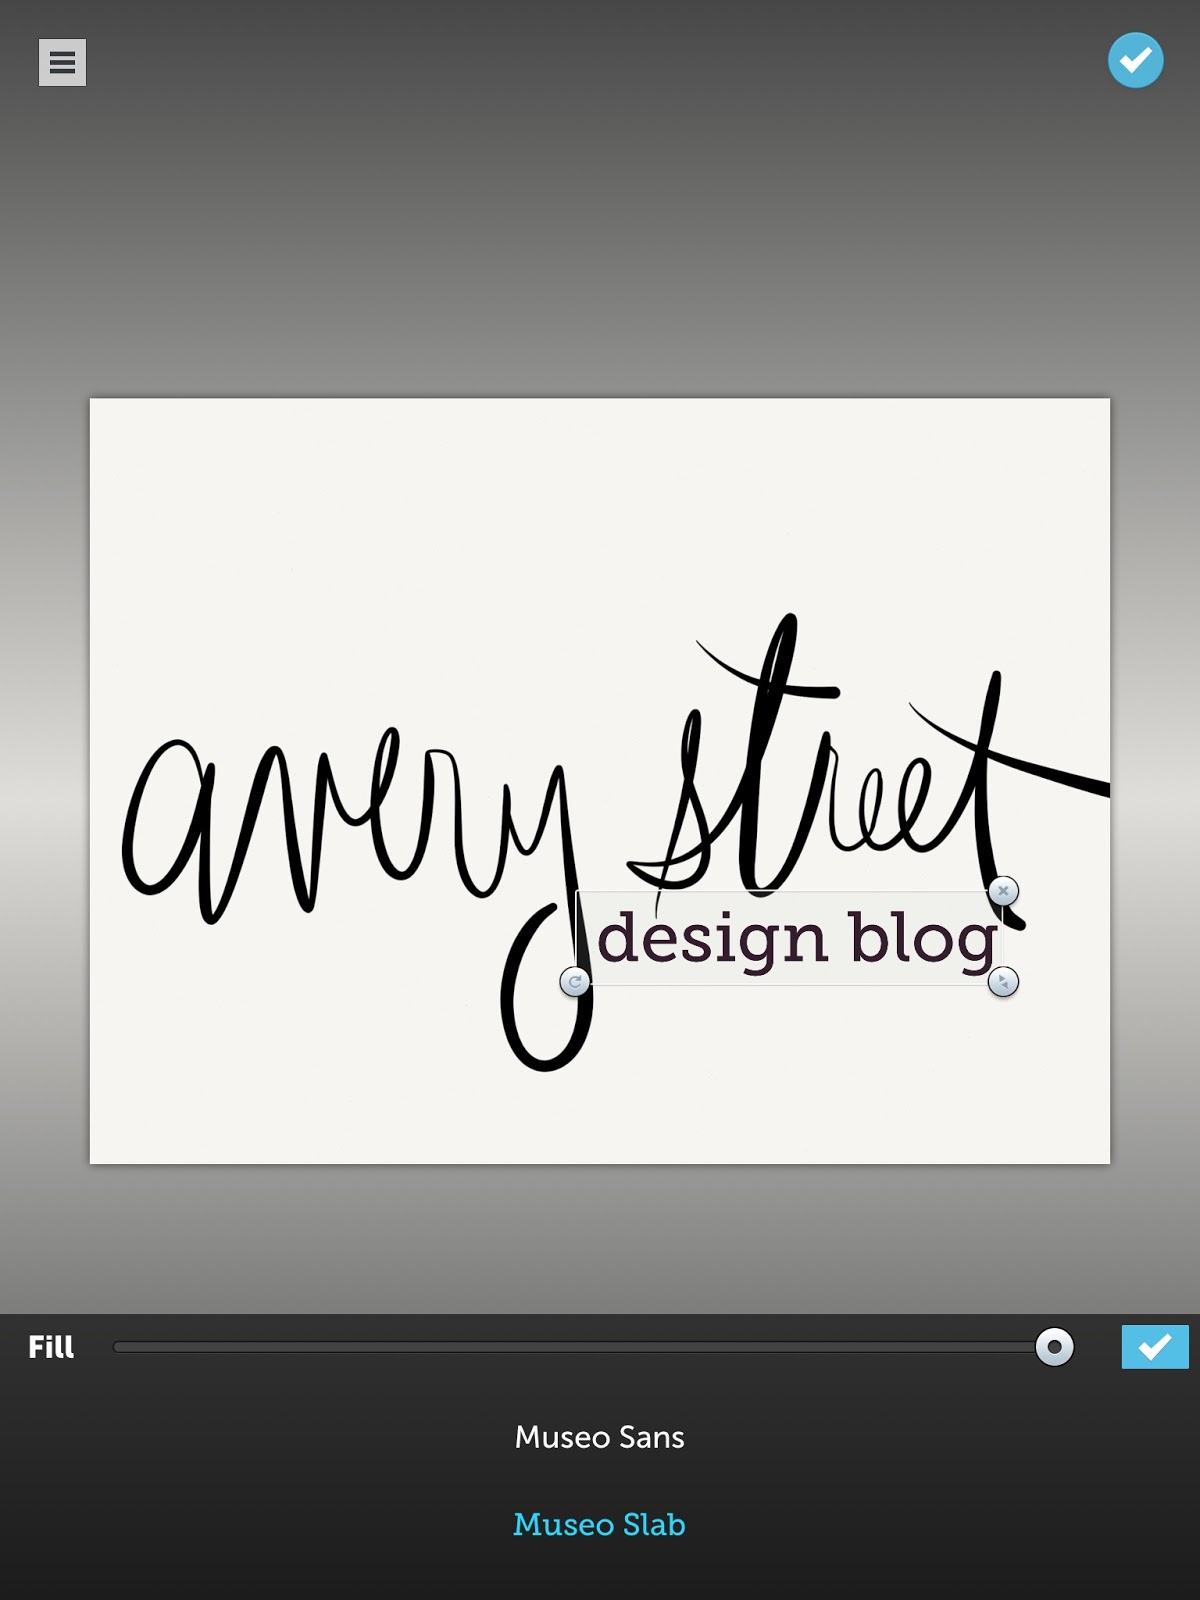
here's the part you've been waiting for. i created the two prints above for steph because it would give her some high-contrast artwork at a zero dollar price tag. i certainly don't want her to feel obligated to use these, so i'm doubling the happiness and offering them to you too as free printables.

{the best resolution way to do it is right-click on the images below, save them to your computer or device, and either print them yourself on a printer like this one, or send them off to shutterfly. they are sized to print at 8 x 10. you can also print directly from this document. promise you'll be nice and only use it for yourself or a gift, ok?}


i'd suggest putting the bottom one on this wall, then put the engagement print above the back of the chair:


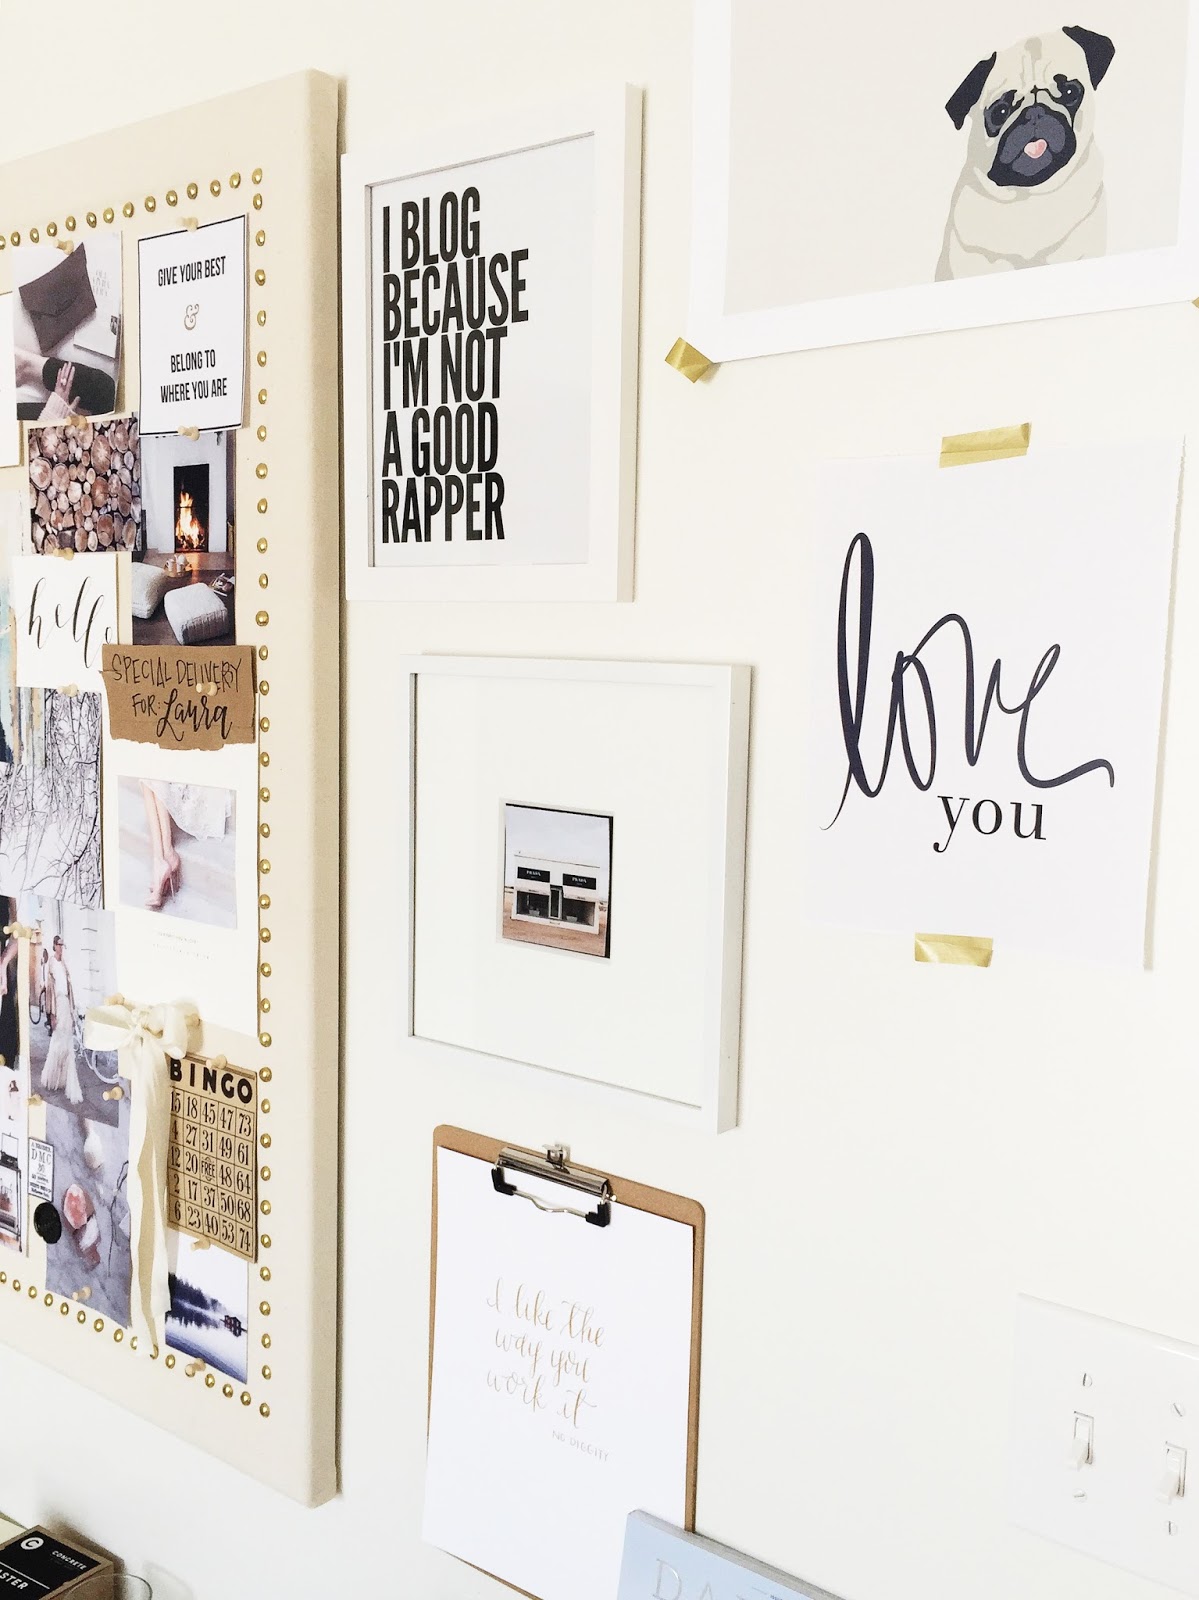
over on the couch wall, i'd create more of gallery like this:

just imagine there is a couch between those photos. oh, and you can see i was playing in poor man's photoshop with how black shades (and a black clock, not sure if that one will fly?!) would look. 


if we add the chalkboard print to this side, with those great pillows and some pops of black, i think it looks really sharp. i'd also love to see steph find some high quality faux blush roses for that table.

here's what we could do on the other side:


the space on the top left with the square print - that's a spot i saved for an adorable print steph showed me of her with her mom from when she was a baby. it would round out that gallery perfectly.

one of the things i love about steph is her love of reading and how she encourages that in her kids. she values keeping books at eye level and accessible. so i'm not styling a thing on those bookshelves. they are perfect as they are- filled to the brim with books her little guys can grab anytime they want.

i did spy this bowl at target this weekend, and it was beautiful and at a very good price of around $15, it would be pretty on top of her books and wouldn't be a big investment if the worst were to happen to it.
as for that white bookcase...


that's going to have to be an in-person project. i'm thinking we'll easily clean up those books and it can look good with basically the same contents, just rearranged a tad. we could even make white and/or kraft paper book covers and go with a monochromatic look. (some people just turn the books around so you only see the pages. while i like the look, that's something you'll only want to do if you literally never read the books, otherwise put that on the list of ways to annoy yourself every day). i'm also wondering if we could find some handy little company to make three matching doors for the bottom. rather than always trying to style it or find baskets, wouldn't it be nice to close it off? just a thought.

well guys, as always, i'd love to hear you weigh-in on this subject. if you have thoughts on what you'd do with this room, feel free to share. having friends to bounce ideas around with is such a great way to narrow your vision, so i know she'd enjoy hearing it!

and to you my darling stephanie- have an awesome birthday! (i know she will since we'll be braving the adler planetarium with our girl holly and 8 kids! bring on the crazy!)

Tuesday, February 4, 2014

there's an app for that


it has come to my attention that the old adage, "there's an app for that," is literally true about everything. want to take better pictures? vsco. erase a photobomber? touch retouch. stick to your diet? lose it. translate your novel into german? iTranslate. (that is a shout out to you, person in germany who reads this blog. hi!)  

over the weekend, i played with three new apps and had a blast creating typographic prints with them. i often see things like this that people have made, on tumblr for instance, but they're not for sale, which is a bummer. finally figuring out how to make some of my own was enormously fun. i decided i'd show you how too.

 the apps i used were paper 53, pic collage, and pic lab hd on my ipad.


so cute for a kitchen, right?


wouldn't this make a sweet gift framed for a new couple?


one thing you should know about me is that i have the navigational sense of a lemming. if i'm driving, i will always take the route i know even if it's longer. i'm sure there is a better way to make these, or some magic all-in-one app, but i haven't stumbled upon it yet. so i'll show you the way i know, and you can feel free to mock me if i meandered needlessly around a town i could have just cut right through.

the first two above were done with pic collage and pic lab hd. pic collage is the avenue to a blank, colored background, and pic lab puts the text on it.

so, here we go. open pic collage (i'll assume you've downloaded them by now). once you're in the app, tap the screen to start a new collage. in the bottom left, choose "change background."


a menu will come up with lots of color choices (scroll right for solids). select one you like, then close by hitting the down arrow at the top left of the backgrounds menu.


that's all you need from this app. save to your camera roll by hitting the box with the arrow coming out of it, located in the bottom right corner of the screen. choose "save to library."


now you have a blank background that you will use pic lab to put text on.


open pic lab hd. tap the picture in the bottom left corner of the screen to access your pictures. choose camera roll, and then choose the background you just made.

to start typing, find the "Aa" on the bottom tool bar. when you tap it, the screen will look like this:


first type your text. then, use the color wheel at the top of the keyboard to customize the color of your text. when you're done, hit the check mark at the top right of the keyboard.

the font menu will then appear. choose the one you like.


after your font is decided, tap the blue check mark to close that menu. now you can use the grey circle at the bottom right of your text box to shrink or enlarge your text. drag the text box with your finger to move it into place.

you can add as many text boxes as you want by tapping the "Aa" to start over again. to edit any of them again, just double tap them, or tap the menu box in the top left of the screen and choose which text you'd like to edit.


when you're all done, tap the blue check mark at the top right of the screen. it will give you several options. i always "save to gallery" to move it to my camera roll.

that's it. i ordered two of the ones i made through shutterfly, and i'm excited to see how they turn out.

{update: the 8 x 10 turned out awesome!! and the 5 x 7 printed too close to the margin on one side, making it off center. i should have previewed the layout in shutterfly- oops!}
for the remaining posters up there (the ones with the calligraphy and the hand-drawn cupcake), i used the same general plan- paper 53 to do the artwork, and then pic lab to put the text on.

paper 53 is so super fun, and i am still figuring out how to use it. the free version includes the calligraphy pen, and that's all i used for my posters. the app can better explain how to navigate it than i can, so i won't bore you with that here. all i can say is, play with it- you'll have fun.

 paper 53 was the only app i used for "you wash, i'll dry" and "mr. and mrs." when you save your work, be sure to put the "save background" function on. (access it by tapping the box with the arrow to save, then tapping camera roll, then sliding to "on"). otherwise, your artwork will be floating on a clear background and won't print correctly.


for the "nothing a cupcake can't fix" poster, i drew the cupcake in paper 53, again using the calligraphy pen. after saving to my camera roll, i rotated them to portait orientation. then i opened pic lab and added text the same way described above.


i hope this was as fun and empowering to learn for you as it was for me. you can tell i'm not a tech geek (yet) so if my explanations were lacking, please forgive me!


Blogging tips